Google Play Console webhooks
Connect Google Play to PurchaseKit so you receive real-time subscription updates (renewals, cancellations, refunds).
Package name
The package name connects your Android app to Google Play Console and PurchaseKit.
Find your package name
- Open your Android Studio project
- Open
app/build.gradle.kts(orbuild.gradle) - Find the
applicationIdin theandroidblock:kotlin android { namespace = "com.yourapp.android" defaultConfig { applicationId = "com.yourapp.android" } }
Configure in PurchaseKit
- In the PurchaseKit dashboard, go to your app settings
- Enter your Google Package Name
- Save changes
PurchaseKit uses the package name to match incoming Google webhooks to the correct app.
Automated setup (recommended)
Run our script in Google Cloud Shell to configure the Pub/Sub topic and service account.
Open Google Cloud Shell
- Go to Google Cloud Console
- Select your project from the dropdown at the top
- Click the Cloud Shell icon (terminal icon) in the top-right toolbar
- Wait for the shell to initialize
Create and run the script
- In Cloud Shell, click Open Editor (pencil icon) to open the editor
- Click File → New File
- Copy the script from purchasekit.com/scripts/google-setup.sh and paste it
- Change line 18: replace
your_project_idwith your Google Cloud project ID - Click File → Save As and name it
setup.sh - Click Open Terminal to return to the terminal
- Run the script:
bash setup.sh
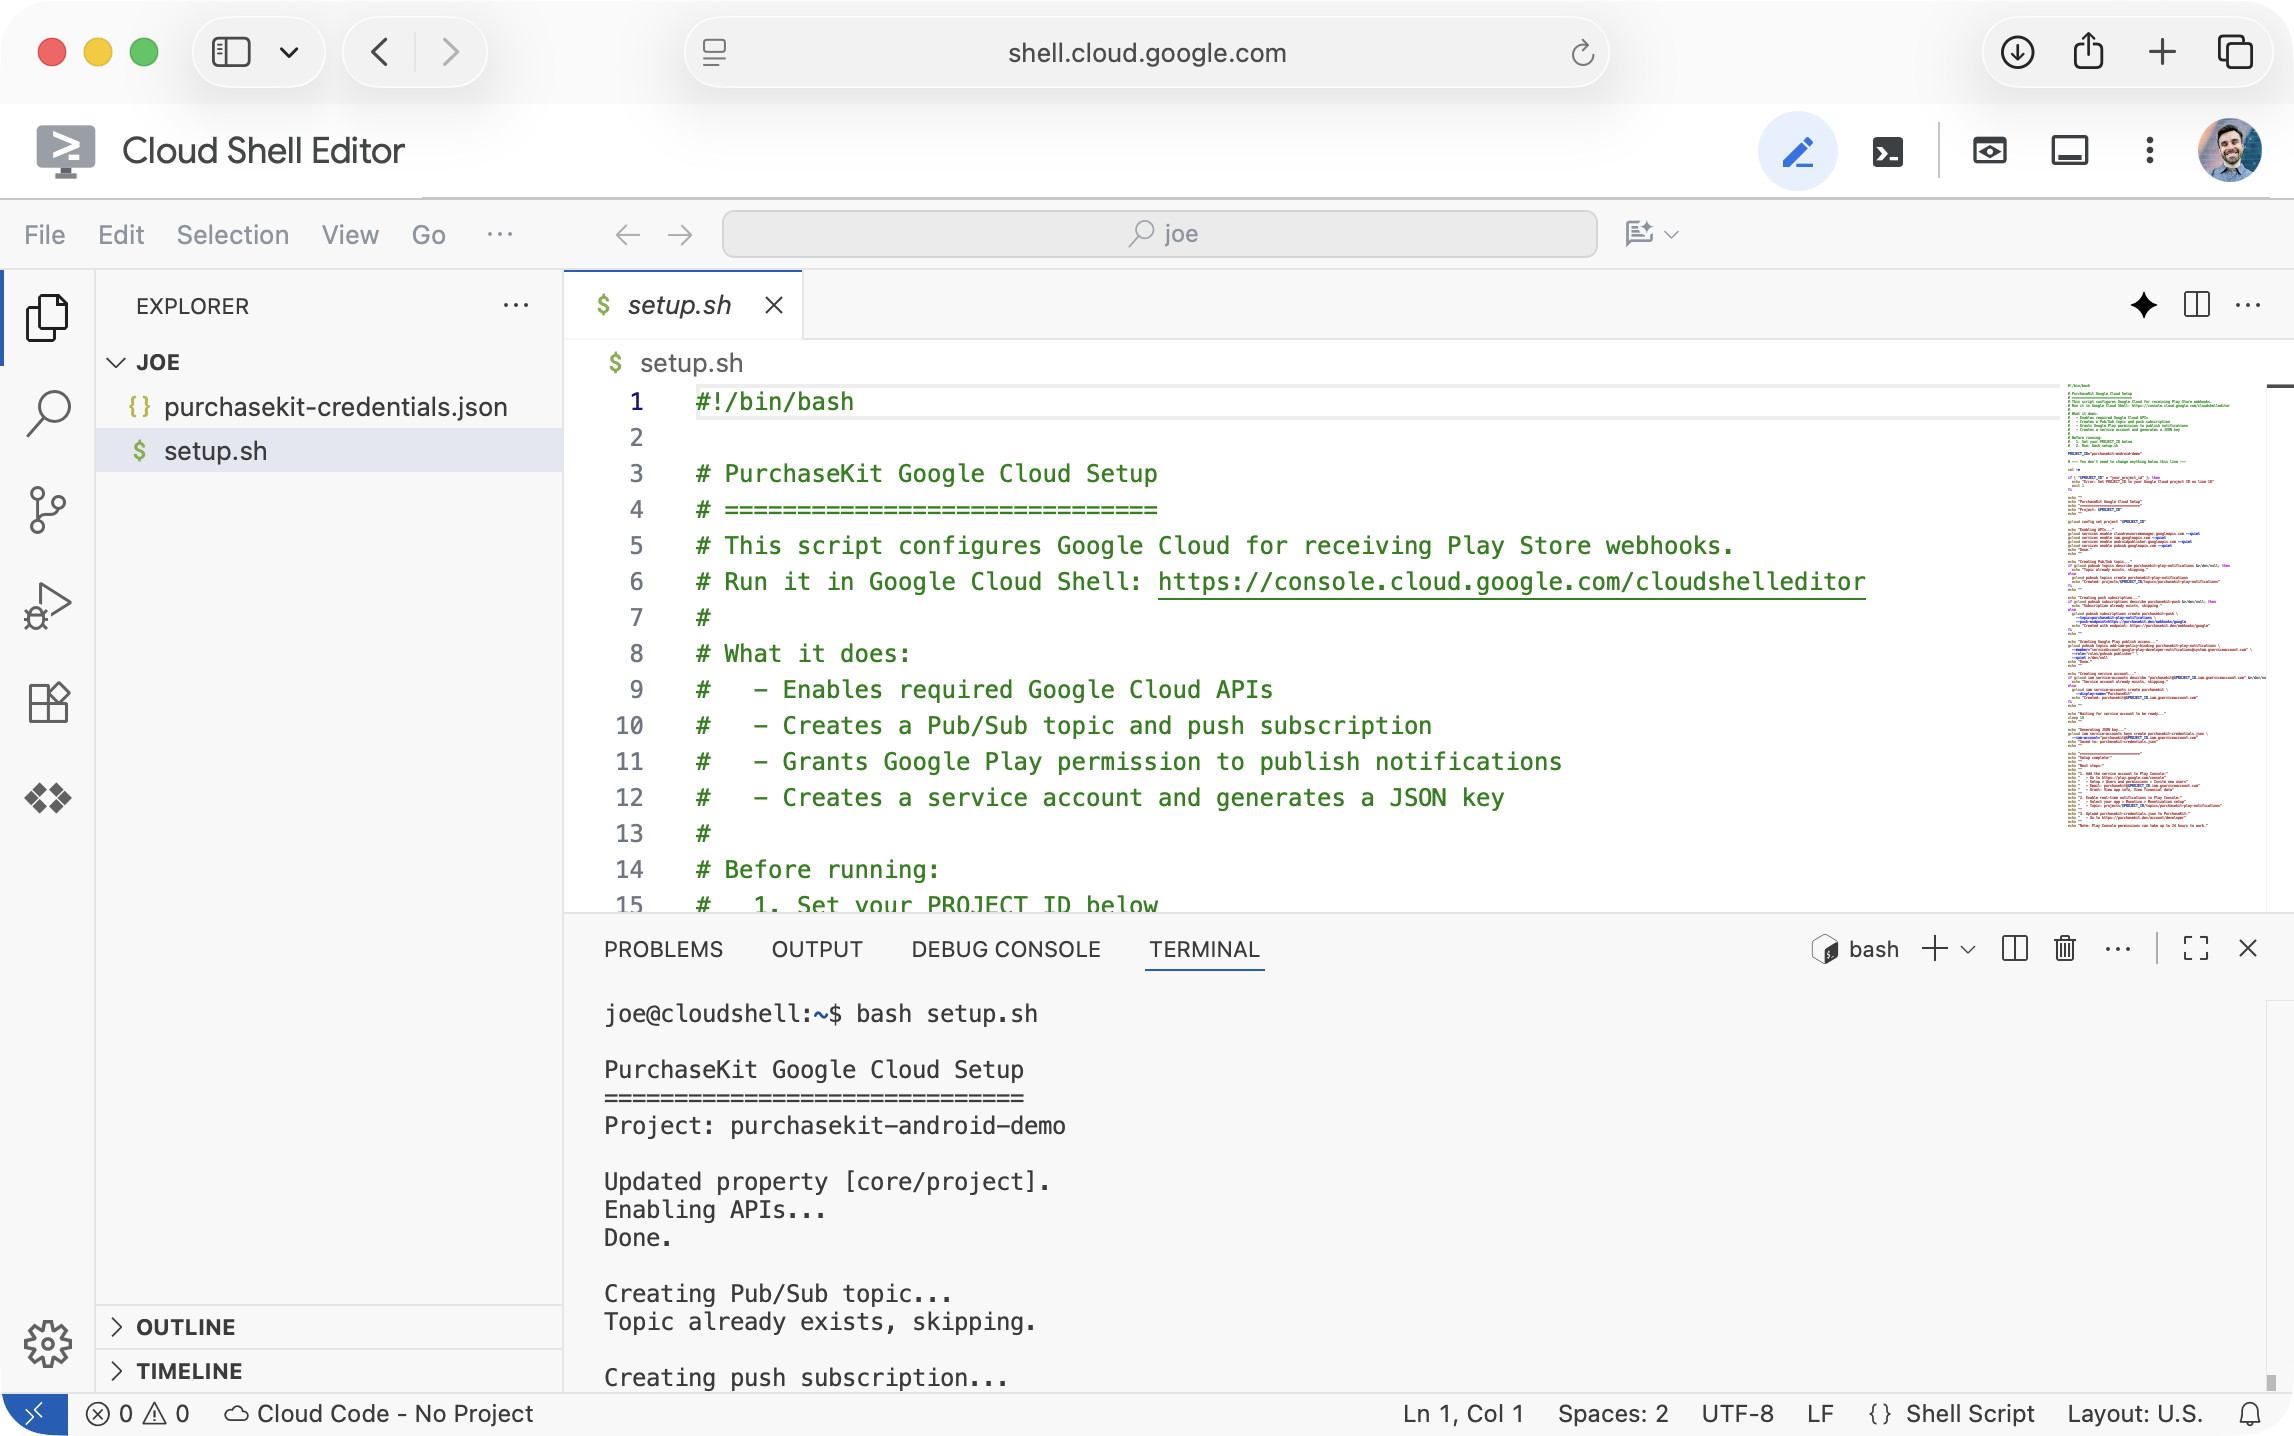
After the script completes:
- Add the service account to Play Console
- Enable real-time notifications in your app
- Upload the JSON key to PurchaseKit
Manual setup
If you prefer to configure everything manually, follow the steps below.
Google Cloud project
- Go to Google Cloud Console
- Click the project dropdown at the top
- Click New Project
- Enter a name (e.g., "My App Purchases")
- Click Create
Enable APIs
- In Google Cloud Console, go to APIs & Services → Library
- Search for and enable:
- Cloud Pub/Sub API
- Google Play Developer API
Create a Pub/Sub topic
- Go to Pub/Sub → Topics
- Click Create Topic
- Enter a topic ID (e.g.,
purchasekit-play-notifications) - Uncheck "Add a default subscription"
- Click Create
Create a push subscription
- Click on your newly created topic
- Click Create Subscription
- Enter a subscription ID (e.g.,
purchasekit-push) - Set Delivery type to Push
- Enter the PurchaseKit webhook URL:
https://purchasekit.com/webhooks/google - Click Create
Grant Pub/Sub permissions
Google Play needs permission to publish to your topic:
- Go to Pub/Sub → Topics
- Click on your topic
- Click the Permissions tab
- Click Grant Access
- For New principals, enter:
[email protected] - For Role, select Pub/Sub Publisher
- Click Save
Create a service account
PurchaseKit needs a service account to fetch subscription details from Google Play.
- In Google Cloud Console, go to IAM & Admin → Service Accounts
- Click Create Service Account
- Enter a name (e.g., "PurchaseKit")
- Click Create and Continue
- Skip the optional steps and click Done
Generate a key
- Click on your new service account
- Go to the Keys tab
- Click Add Key → Create new key
- Select JSON
- Click Create
- Save the downloaded file securely
Link to Google Play Console
- Open Google Play Console
- Go to Users and permissions (in the left sidebar, under Setup)
- Click Invite new users
- Enter the service account email (looks like
[email protected]) - Set permissions:
- Account permissions: View app information and download bulk reports
- Financial data: View financial data, orders, and cancellation survey responses
- Click Invite user
- Click Apply on the access level page
Note: Permissions can take up to 24 hours to propagate.
Upload to PurchaseKit
- In the PurchaseKit dashboard, go to Account → Developer
- Upload the JSON key file you downloaded
- Click Upload credentials
Enable real-time notifications
- In Google Play Console, select your app
- Go to Monetize → Monetization setup
- Scroll to Real-time developer notifications
- Enter your Cloud Pub/Sub topic name:
projects/YOUR_PROJECT_ID/topics/purchasekit-play-notifications(ReplaceYOUR_PROJECT_IDwith your Google Cloud project ID) - Click Save changes
Test the connection
- Click Send test notification
- Check the PurchaseKit dashboard for the incoming webhook
- If no webhook appears, verify:
- Pub/Sub subscription URL is correct
- Pub/Sub Publisher permission is granted
- Service account permissions have propagated (wait 24 hours)
Next step
Return to Getting started to complete your PurchaseKit integration, or see Android setup if you haven't added the PurchaseKit library yet.